
![]()
Hello and welcome to ewespin.com.
First, many people just starting out in knitting or spinning may have not yet realized that the word “ewe” is defined as “Female sheep”. So, the product and company name are based on the wool that is sheared from sheep, which, in turn, allows spinning wheel users to spin yarn. Of course, there are other materials that can be used in the spinning of yarn, for example: cotton, alpaca, angora, and silk.
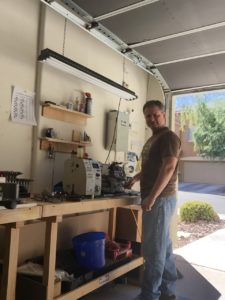
My name is Jeff Alberti, and for the last few years I have been intermittently working on a new electric yarn spinning wheel, the ewespinner. However, do to some personal circumstances, and a depletion of my investment funds, I can no longer pursue development of this product. However, I have provided details on the tools and the different parts used to manufacture and assemble the ewespinner prototype, for anyone interested.
I am an Information Technology person by trade, and have decided to re-enter the job market. I really enjoyed solving all the problems of design, development, and manufacturing of this widget. And I was so close to making a production ready product. I really wanted to work for myself and enjoy the daily challenges of founding and growing a small entrepreneurial business, but life loves to through curve balls, and one must move forward, even though you may have to take several steps back, first.
The brain of the ewespinner is an Arduino Micro ATmega32U4 microcontroller, specifically the RobotDyn Micro ATmega32U4-MU clone. I programmed the microcontroller to use a custom pulse width modulation (PWM) frequency of 15.62Khz. PWM frequencies below this number would cause an annoying high-pitch whine (noise), which is detectable by the human ear. The default PWM for the Arduino Micro is 980 Hz (very annoying motor sound, imagine finger nails down a chalk board). The ewespinner uses two DC 12-volt, 8000 RPM (revolutions per minute) Tsiny TRS-495SM-1280 motors. The Arduino Micro is not able to control the power to these motors itself and requires a device called a motor driver. The motor driver takes input from the Arduino and supports the necessary 12 Volts and up to 3 Amps that is needed to drive the two DC motors. After many months of research, testing, and burning out less expensive, falsely advertised Chinese made motor drivers, I finally found a reliable solution using the Pololu Dual MC33926 motor driver.
To detect and then calculate the revolutions per minute (RPM) of the front and rear DC motors, I used two unipolar hall-effect sensors manufactured by Melexis.
Because the Arduino was very small, it was necessary to plug the device into what is called an expansion shield. This shield provided the necessary input / output pins to provide power and connect the many different components (buttons, potentiometers, LED displays, motor-driver, etc…). If the ewespinner was successful, I would have designed my own printed circuit board (PCB), which would have made the circuit board much smaller, and reduced the number of wires by replacing them with copper traces embedded within the printed circuit board itself. The same company, RobotDyn, that makes the expansion shield, also makes the colored light emitting diode (LED) displays (4-Digit LED 0.56″, 7-segment Display Tube driver TM1637) used within the ewespinner.
I used Sketchup Free to design a 3D model of the ewespinner before it was ever built, this allowed me to visualize the spinning wheel and position all the different components prior to building a physical prototype.
Here is one of the very first designs of many:
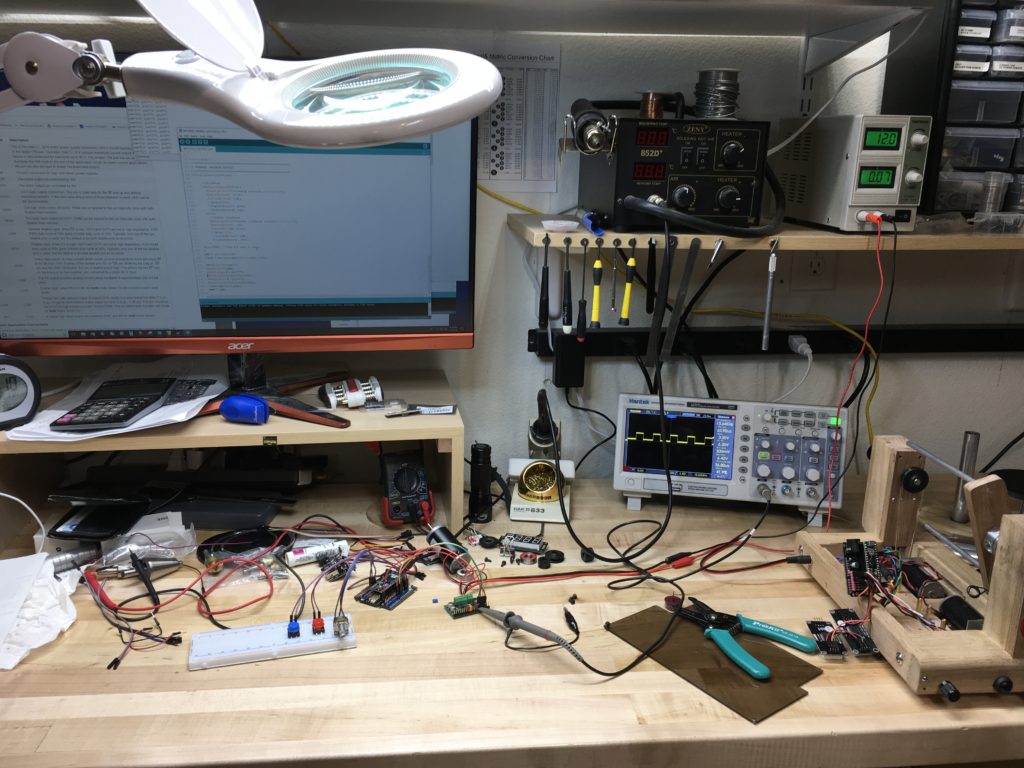
 Once the ever-changing design was “good enough”, I began building each of the components using different tools. I used a Grizlly G0768 metal lathe to create the main aluminum shaft and all custom acetel knobs, drive pulleys, and clutch system. I used an Incra precision router table and fence to manufacture the wooden body. All necessary wood cuts were made using a Bosch 12 in Dual-Bevel Glide Miter Saw. One tool that I wished I invested more in would have to have been a better drill press; I can’t stress the importance of the drill-press’ ability to drill holes that are as straight as possible and which can minimize the wobble of drill bit heads; I should of looked closer into purchasing a milling machine. I even researched computer numeric control (CNC) routers, lathes, and milling machines, but the costs were to great for building just a prototype.
To precision cut the acrylic (Plexiglass) cover without cracking or breaking it, I used the Rockwell BladeRunner X2 (an upside down jigsaw), along with using a fine tooth metal cutting blade, I could easy precision cut the acrylic cover to the necessary specifications the ewespinner required.
Finally, I made custom 3/32″ diameter, clear urethane drive bands using cord manufactured by MJMay.
Features
Features that have been implemented so far to improve usability and ease of use:
- Pull-pin bobbin quick release – easily remove/install bobbin within less than 2 seconds.
- Dual RPM (revolutions per minute) LED displays – (red = flyer RPM, blue = bobbin RPM). Easily set desired RPM and observe current RPM of the flyer and bobbin. Easily configure the same settings in future yarn spinning sessions. No more guessing.
- Variable double-drive system – separately control the RPM of both the bobbin and the flyer motors to have consistent take-up (the rate at which fiber enters the orifice and winds onto the bobbin), and fiber twist. Setting the desired RPM for either motor is as simple as turning one of the two corresponding knobs on the front of the ewespinner. When setting the blue bobbin RPM to spin slower than the red flyer RPM, the newly twisted yarn will wind onto the bobbin. The slower the blue bobbin RPM is, the faster the take-up will be. Note: there is no Scotch tension string or Irish tension leather strap used in this system.
- Auto-adjusting RPM – microcontroller continually monitors and adjusts bobbin RPM and flyer RPM to maintain selected RPM even when additional yarn is spooled onto the bobbin.
- Slow start and stop – help reduce sudden jolts that could cause yarn to de-spool from bobbin on ewespinner or bobbins on lazy cate when plying.
- Large start/stop button – conveniently located on front of spinner for quick access while drafting. No additional foot pedal switch and cord to get in the way.
- 4″ diameter bobbin – the larger the diameter the more yarn can be spooled.
Other Specifications
- Orifice size – The diameter of the orifice has two sizes in two different places: the front orifice is 3/8” and the orifice on the shaft has a diameter of 1/2”. The slider uses a 5/16” diameter hole. As of right now, the largest diameter I can make the front orifice is 3/8”. I will have to see how the ewespinner will work with art/bulky yarns, which require at least a 1/2″ orifice. Do to the limited space on the ewespinner’s vertical support post I can only use specific diameter bearings, which limits the the shafts diameter and the front orifice to 3/8”.
- Dimensions – 15.5″ length, 7″ width, 8″ height.
- Weight – the current weight of the ewespinner with one bobbin is 3.5 pounds. A 4″ diameter bobbin by itself weighs 4.6oz.
- Noise Level – I have provided a video (see bottom of this page) showing an iphone 6 plus running a noise meter application called Decibel X. This is a free to download app found on the Apple store and Google play. I have only tested it on an iphone 6 plus. Because it’s free, any user with an iphone/iPad/Android can download the app and obtain their current spinning wheel’s noise levels. The levels can then be compared to the ewespinner’s noise levels. Because there are so many variables that can effect the way sound is received by the phone’s microphone (distance from noise, noise/vibrations traveling through table, the phones microphone quality, the microphone position, etc…), it’s impossible for me to professionally provide accurate sound levels without an expensive sound meter and special quiet room. I know that the iphone application is not as accurate as an expensive sound meter device, but the free downloadable app allows most users to obtain and then test their own spinning wheels for comparison without needing a special foam covered room and having to spend any money.
- Bearings – I am currently using stainless steal bearings that use ball bearings made of Si3N4 (Silicon Nitride). These balls are not metal, they are ceramic. The advantages of ceramic bearings vs chrome steel balls are: (1) Lighter weight (50% lighter than steel). (2) Their surface is 75% smoother than steel. (3) They produce less heat, which increases their life span. However, in my testing, one disadvantage I have noticed is that they make more noise than their chrome steel cousins. The end result is the motors have to do less work reducing the amps needed to spin the flyer and bobbin at higher speeds.
- Power usage – the ewespinner uses 1200mA (14.4 watts) at 12 volts DC when both motors are spinning at 1500 RPM, 600mA (7.2 watts) when both motors are spinning at 900 RPM, and 110mA (1.32 watts) when the ewespinner is stopped. Note: there are 1000mA (milliamps) in 1 amp.
- Battery option – any 12 volt DC battery supply with the right connector can provide power to the ewespinner (Important note: voltages larger than 12V will destroy the ewespinner’s electronics). Recommended 12V DC options include: 12V DC portable Li-Ion battery packs, or a cigarette lighter adapter connected to a car or RV that uses a 12V DC battery supply. If the average ewespinner spins at 900 RPM, the ewespinner will consume 600mA (milliamps) per hour, so a fully charged 12V DC 6000mAh Li-Ion battery pack should theoretically last around 10 hours (6000 milliamp hours divided by 600 milliamps = 10 hours).
- Wood material – currently the ewespinner is made of red oak.
- Warranty – This has yet to be determined, but there are bearings, motors, electronics, buttons, knobs, acrylic, wood, sell price, etc… to consider in the determination of the warranty period.
The Design
- Orifice offset – As you may have already noticed, the orifice is located on a vertical support that is offset to the right of the ewespinner’s frame. This is different than most spinning wheels where it’s usually centered. This was done so that the large LED (light emitting diode) RPM (revolutions per minute) gauges could be viewed through an acrylic cover. It was not possible to place these displays in the front of the spinner do to wiring and space limitations.
- Acrylic cover – I want the ewespinner to be technologically advance and thought the best way to promote this idea was to showoff the electronics, wires, and motors. This would give the ewespinner a high-tech appearance. The best method to accomplish this is to use a semi-transparent acrylic cover. This design can either be modern and cool to some users or unwanted by others, but I hope most will like it.
- The Big Red button – After observing many e-spinner users placing the foot pedal switch on the table or near by and using it as tap switch to start and stop the spinner, I thought why not just place a big, easy to press button on the front of the ewespinner where it will be conveniently located while drafting. The button is the same button found on old stand up video arcade game machines. The buttons are extremely sensitive to being pressed, very little force is needed to press them.
Threading the ewespinner:
Ewespinner’s controls:
Noise level of the ewespinner at different RPMs (500, 800, 1000, 1200, and 1500 RPM). The iphone 6 plus running the Decibel X iphone app is positioned 6 inches from the front of the ewepinner:
New momentary push button interface. The two potentiometers (knobs) previously used were difficult to select a specific RPM. Additionally, the potentiometers would cause the previously set RPM to change slightly on its own.
Have questions or suggestions, please discuss using the raverly forums:
https://www.ravelry.com/discuss/electric-spinners/3812698/1-25#18